This morning a mysterious package was delivered to my doorstep… 
Even the box was pretty cool, featuring a breakout diagram for a top-secret hamster-powered rocket.

I literally had no clue what it could be until I opened the box to discover… the much-anticipated Google Chrome OS Notebook! Apparently one of my friends in high places found me worthy to be seeded with a pilot unit. Thanks, Google!

A single sheet of paper tells you everything you need to know. It is the only instructional piece of paper for the computer in the box. Note the built-in webcam and microphone, special keys at the top of the keyboard, and lack of a CAPS LOCK key! (Good riddance!)

Here’s the battery, which is the first thing I inserted to get to work. It’s rated to power the notebook for at least 8 hours under normal usage. My insider source tells me it’s also rated to last 8 days in standby mode. (I haven’t had enough time yet to test this claim!) Is “Mario” the name of the battery or the computer itself?

Here’s a view of the very unassuming bottom of the laptop. Probably the main thing thing of note is that if you peel away a black sticker along the inside edge, you can flip the switch to go into Developer’s mode, which is built-in functionality for rooting/jailbreaking to gain access into the Linux underbelly. Has anyone found any compelling things to do yet while in Developer’s mode?

The Cr-48 comes equipped with headphone jack, USB port, AC power jack, and power indicator LED on the right side. On the left side is the VGA port and some vents. I think that’s about it. Someone actually asked me already if there’s an HDMI or other digital video-out port. Definitely not.

The keyboard has dedicated buttons on the top row for browser navigation, and as mentioned earlier, a dedicated Search / New Tab button instead of the CAPS LOCK key. The keyboard somewhat resembles the 13.3-inch Apple Macbook keyboard. The extra large left and right cursor keys actually still confuse my fingers. The Chrome OS help graphic below explains what the rest of the new top-row buttons are.


Here’s the AC plug. I’ve barely had to use it so far. The form factor is certainly not as elegant as the Apple MagSafe plug, but that connector has few rivals right now. The Chrome notebook plug doesn’t feel particularly sturdy, but it seems to get the job done.

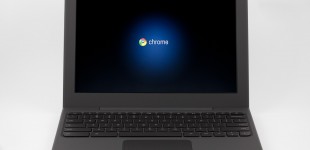
The notebook pretty much woke up and was ready to go the second I opened the lid. Impressive!

On first boot, it immediately asked me to click through the User Agreement and then to connect to a network. I connected it to my local wifi network with WPA2, but I believe you could also initially connect it to the Verizon 3G network that Google is paying for during the first two years (up to 100MB/month). Once it had a live Internet connection, it checked for Chrome OS updates and rebooted, asked me to login using my Gmail account (I skipped the part where it asked me to take a photo of myself using the built-in webcam), and launched into the main Chrome OS home screen. 
I actually had to do some web research to learn that the keyboard shortcut to take a screenshot is Ctrl + Next Window, which is where the F5 key would normally be. After taking the screenshot, you can see it by using the keyboard shortcut Ctrl + O to open the Downloads panel and inspecting the Screenshots folder.

More photos and thoughts to follow as I continue to give Chrome OS a good shake. Got questions about the Google Chrome OS Notebook? Leave a comment and I’ll answer with as much detail as I can!
Multimedia and Computer Services