Lightroom 3 is finally out of beta, so I wanted to show you the install process, and give the new noise reduction feature a spin! The screenshots for this walkthrough / tutorial were created on a Mac, but most of the directions should be easy to follow on a Windows machine as well.
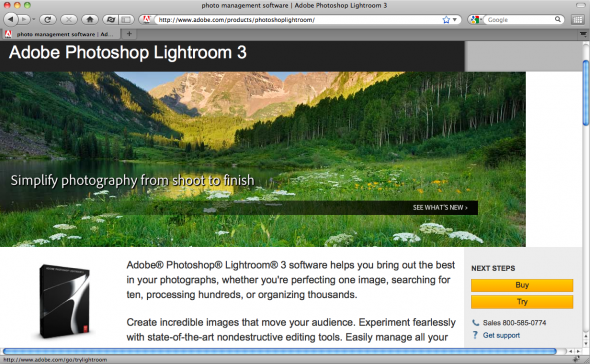
First, you’ll need to download the Trial version of Lightroom 3, straight from Adobe.com. The trial version will last you 30 days to give LR3 a test run. You can also pre-order the CD version of Lightroom 3 from Amazon.com
and use the 30-day trial while you wait for your serial number. The CD content should be exactly the same as the downloadable file.
Considering all the other people probably downloading the file at the same time, I was surprised it took less than 5 minutes to download. Once the download is completed, double-click the file to get started. For Mac users, the default filename is Lightroom_3_LS11.dmg. It’s about 79MB.
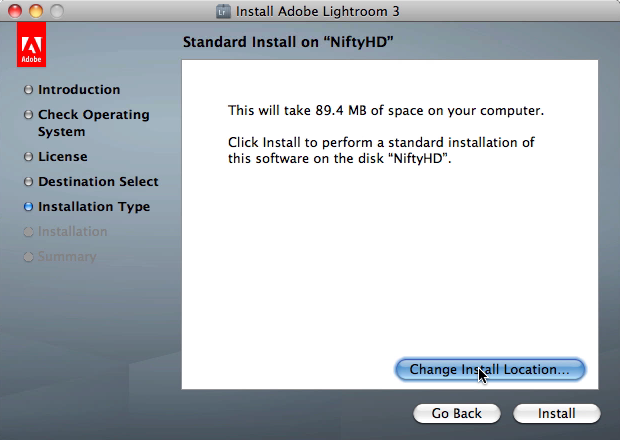
“Is it possible to install Lightroom on an external hard drive so I can use the application, presets, and plug-ins on multiple computers?” Yes! You can install Lightroom on any hard drive partition you want. (This worked in Lightroom 2 as well.) Just click the Change Install Location button if you want to redirect the installation.
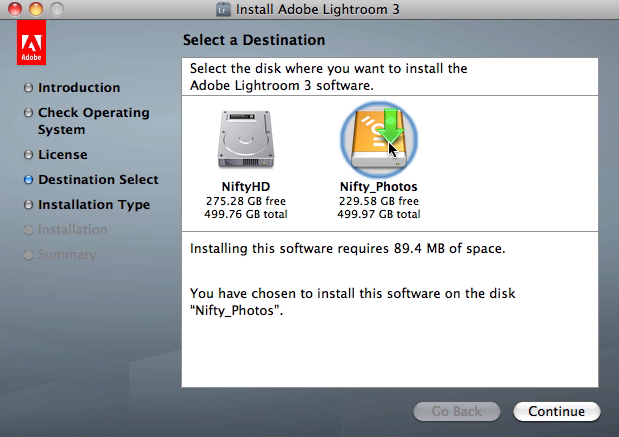
I picked the external drive where all of my photos reside as the place to install Lightroom 3, since I like to switch between working on my desktop and laptop machine. Click Continue and work your way through any additional dialog boxes. Total installation time: 5 minutes.
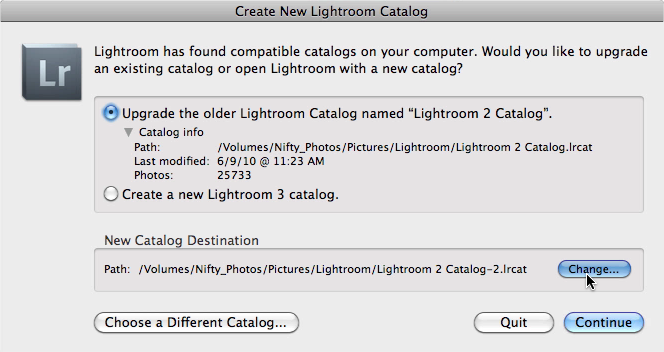
When I launched Lightroom 3 for the first time, it intelligently detected my old Lightroom 2 catalog and asked if I wanted to upgrade it. Keep in mind that this is non-destructive process, so it will generate a whole new Lightroom 3 catalog that references your photos, without spoiling your Lightroom 2 catalog, in case you want to go back to the old version. Select the Upgrade option and then click Continue.
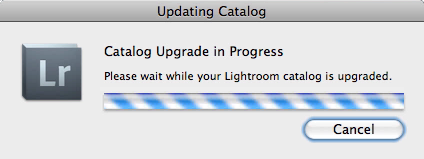
Lightroom 3 takes some time to duplicate and upgrade your existing catalog. Total upgrading time on my Mac Pro was 10 minutes. (Earlier today, I got a little confused and thought that it was going to need to duplicate all of my 25000+ raw photo files as well, but it does not need to do that.)
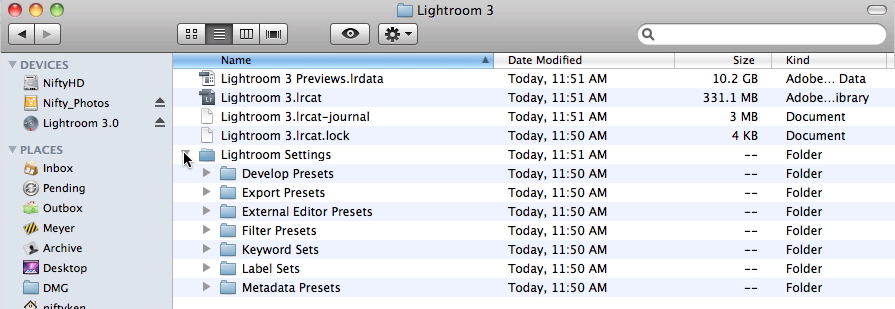
After the upgrade process finished, I checked the contents of my external hard drive. As you can see, the new Lightroom 3 catalog lrcat file was 330MB and the Previews lrdata file was about 10GB. This was for 25000+ photos.
I’m also showing you this screen because you’ll notice that you can migrate your Lightroom Presets into the Lightroom Settings folder. I did successfully copy my LR2 presets into LR3 using this method, but did not have a chance to test whether LR2 plugins are fully compatible in LR3. The main ones I use are Jeff Friedl’s Export to Facebook plugin and the Photomatix HDR plugin, both of which claim to be compatible with LR3.
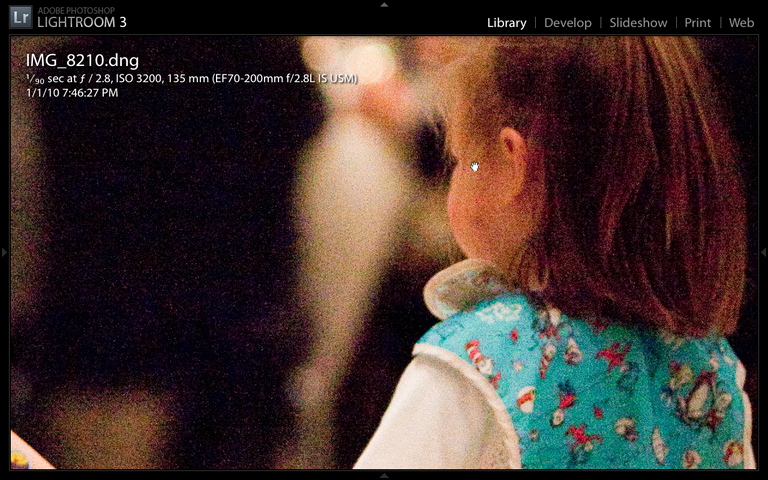
Okay, let’s try this out! One of the most-anticipated features of Lightroom 3 is the new and improved Noise Reduction function, so I wanted to see it for myself. I pulled up this grainy indoor photo, which was shot at ISO 3200, which pretty much equates to a LOT of noise. Even at this small image size, the noise is very obvious. I played with the Noise Reduction sliders a bit and… was disappointed to find that nothing amazing seem to be happening. The results pretty much resembled the mediocre noise reduction capability of Lightroom 2. Disappointing.
But wait! Take a closer look!
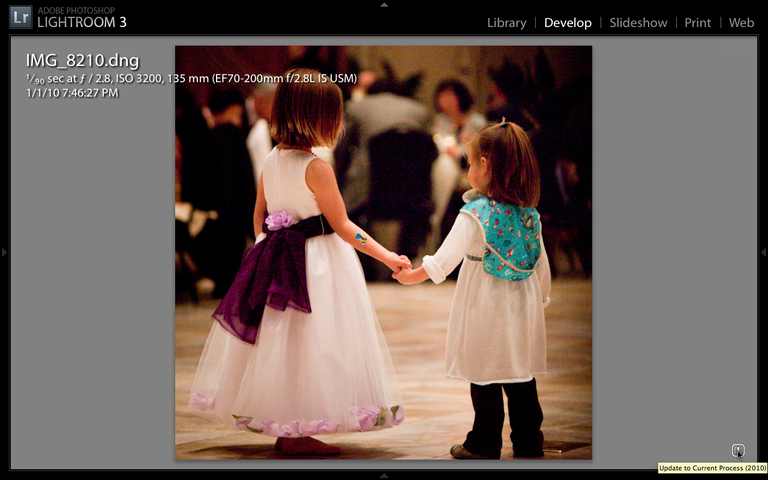
I had overlooked the little exclamation mark icon in the bottom right of the Develop window. When you hover over it, the tooltip somewhat cryptically says “Update to Current Process (2010).” I figured it couldn’t be worse than what I was seeing so far, so I clicked the button.
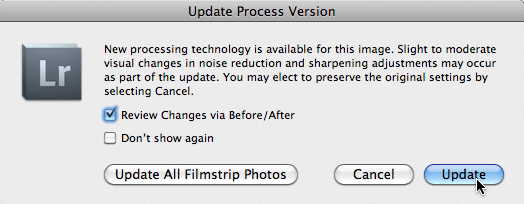
This dialog box popped up to explain that Lightroom 3 was about to apply the new and improved version of Noise Reduction to this image. I checked the “Review Changes via Before/After” box and clicked Update with great anticipation.
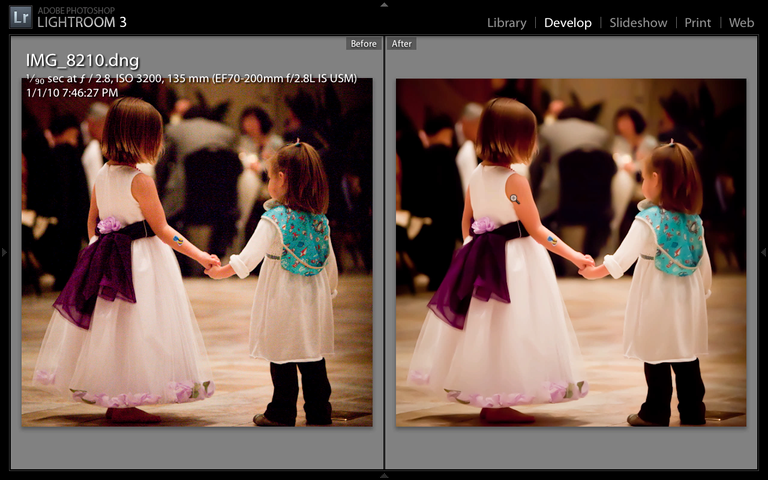
Whoa. Even without 100% zoom, you can see that something significant happened between the Before and After versions. Now, in case what you’re seeing is “too much” or “too mushy” (e.g. the detail in the girl’s hair is gone) don’t forget that you can adjust the Noise Reduction sliders to tone down the effect to your liking. (And if you don’t notice much difference at all, don’t forget to adjust the Noise Reduction sliders to see more of the effect.)
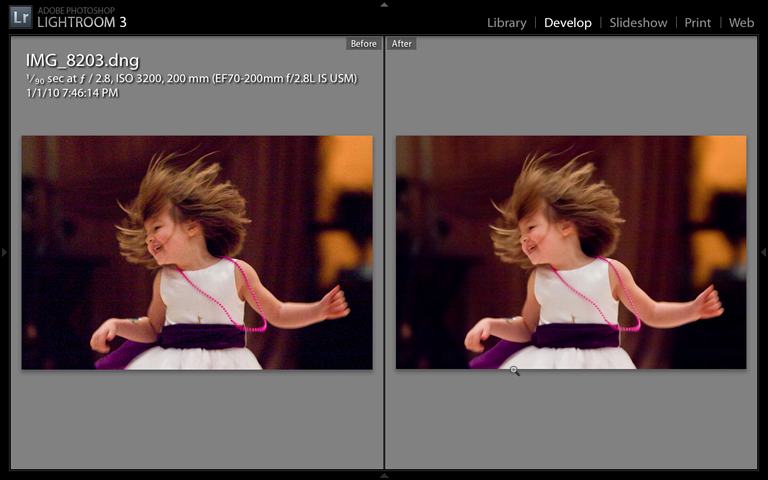
Here’s another example of a dramatic improvement visible even when zoomed out, brought about by simply applying the “Update to Current Process (2010)” button. Again, the beads on the necklace are starting to smooth over too much, so the settings could use some tweaking. But I like what I’m seeing!
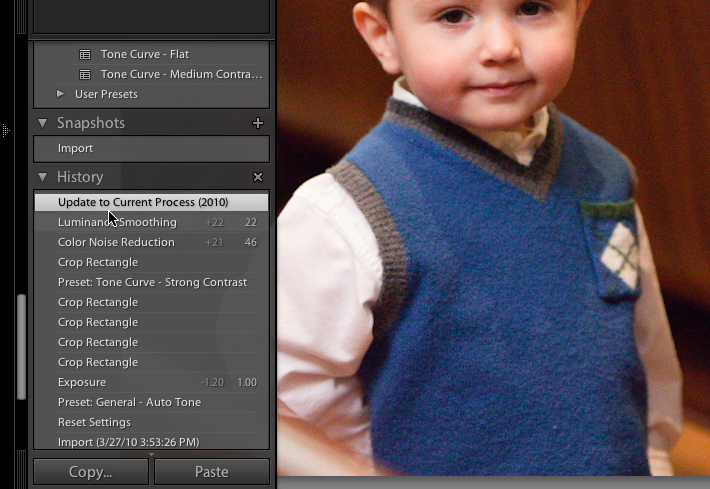
Just in case you don’t like the effect of “Update to Current Process” at all, keep in mind that you can still go back non-destructively to an earlier state by using Undo or the History panel. In Lightroom 3, you just got yourself an extremely powerful option, but you can still decide when you want to use it.
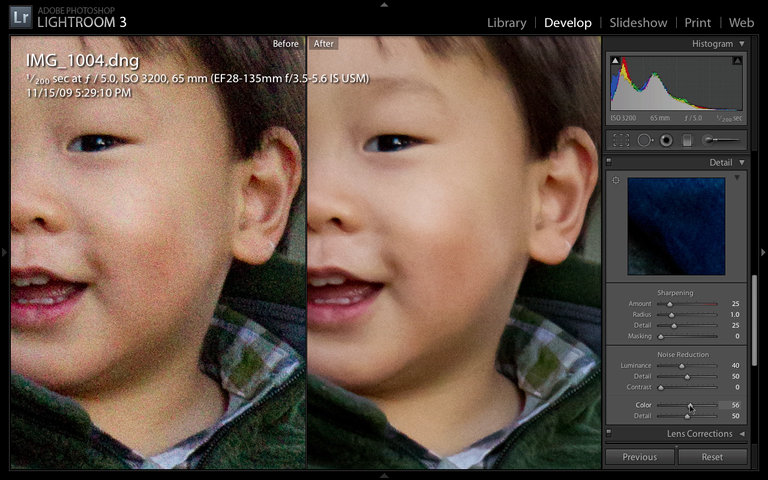
Here’s one more example of the Noise Reduction tool. I think it’s great! Now, some readers may try it and decide that they still prefer the capabilities of Noise Ninja, Topaz DeNoise, or other specialized tools to get the job done. Yes, for the wretchedly noisy images that LR3 can’t adequately clean up, I may still need to export it out to another plugin where I can define the noise print or do other things to refine the parameters, but I envision that much of my basic noise reduction can finally be done straight in Lightroom (and non-destructively, at that). With some decent noise reduction built right into Lightroom, I can save time by staying in Lightroom for more of my workflow.
Okay, that’s all for now. Check out more of my photos at http://www.kennethphotography.com, and let me know if you have any questions, especially pertaining to installing Lightroom 3 on an external hard drive. I’ll have to blog again when I get a chance to try out the new lens correction, perspective correction, watermarking, and Flickr integration tools, but I like what I see! What do you think, and what has been your experience with Lightroom so far?
Still haven’t pre-ordered Adobe Photoshop Lightroom 3?? Support this site by ordering it through this link to Amazon
!

Do you do individual consulting in the SF Bay Area? I am getting hopelessly confused by the trial LR3 update to LR2; in particular trying to use a new camera for RAW capture at the same time. I can see the captures on the camera but only part of them import to LR3 and I don’t wish to lose anything! If I could purchase some time with you, to bring my laptop (not a Mac, but a Dell with Windows) and my card reader, etc., and see if you can troubleshoot, I’d appreciate it. Thank you for considering this … /zina
Hi Zina,
YES! I would love to help you with your Lightroom questions. I have made the LR2 to LR3 transition on a few computers before, so I think I should be able to help. Please give me a call at 650-733-6749 or email me at kenneth@digitallifesavers.com and we’ll work something out.