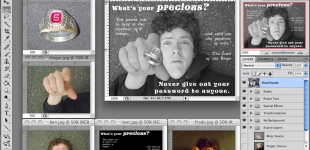
Learn tricks of the trade for combining multiple images together. This tutorial will walk you through some of the main image compositing features of Photoshop. If you are looking for a tutorial on using Photoshop for basic photo editing, please see the Photo Editing tutorial. All materials have been prepared using Adobe Photoshop CS4.

Getting started
Click and download the file called photoshop_workshop.zip to a temporary storage space on your computer.
From your computer, double-click photoshop_workshop.zip to unpack a folder containing the tutorial files.
The following is a listing of the package contents:
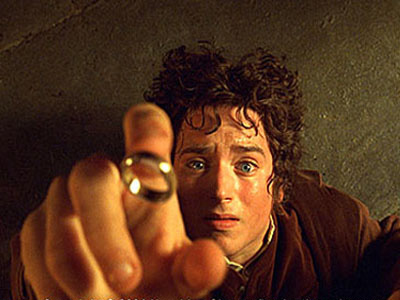 |
frodo.jpg is an image of the hobbit Frodo, from The Lord of the Rings, whose image will serve as the inspiration for our project. |
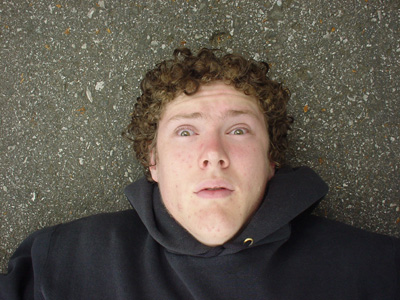 |
ben.jpg is an image of Ben, who will serve as the subject of our project. |
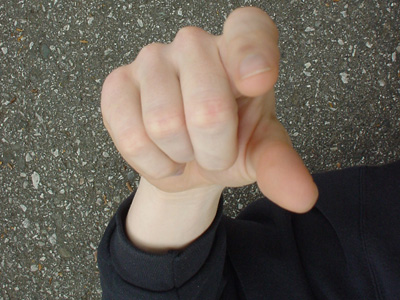 |
finger.jpg is an image of Ben’s hand. |
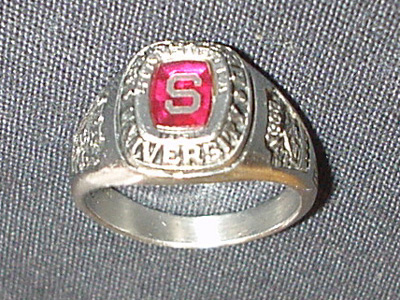 |
ring.jpg is an image of a Stanford class ring against a checkered fabric. |
 |
text.jpg is a sample of that text that was used in the sample project. STONEHEN.TTF and STORYBOO.TTF are the two fonts used for this project. |
 |
photoshop_workshop_notes.doc is an outline of the tutorial. It lists key concepts to learn, and provides an outline of the image compositing process. The rest of this wiki entry details this step-by-step process. At this time, the document is updated for Adobe Photoshop CS2. |
(Optional) If you wish to install the included fonts:
- Download the Stonehenge and Storybook fonts to your computer.
- Windows XP: Drag and drop the TTF files into your system’s C:\WINDOWS\Fonts folder.
- Mac OSX: Double-click each font and click the “Install” button.
Create a working Photoshop document (PSD)
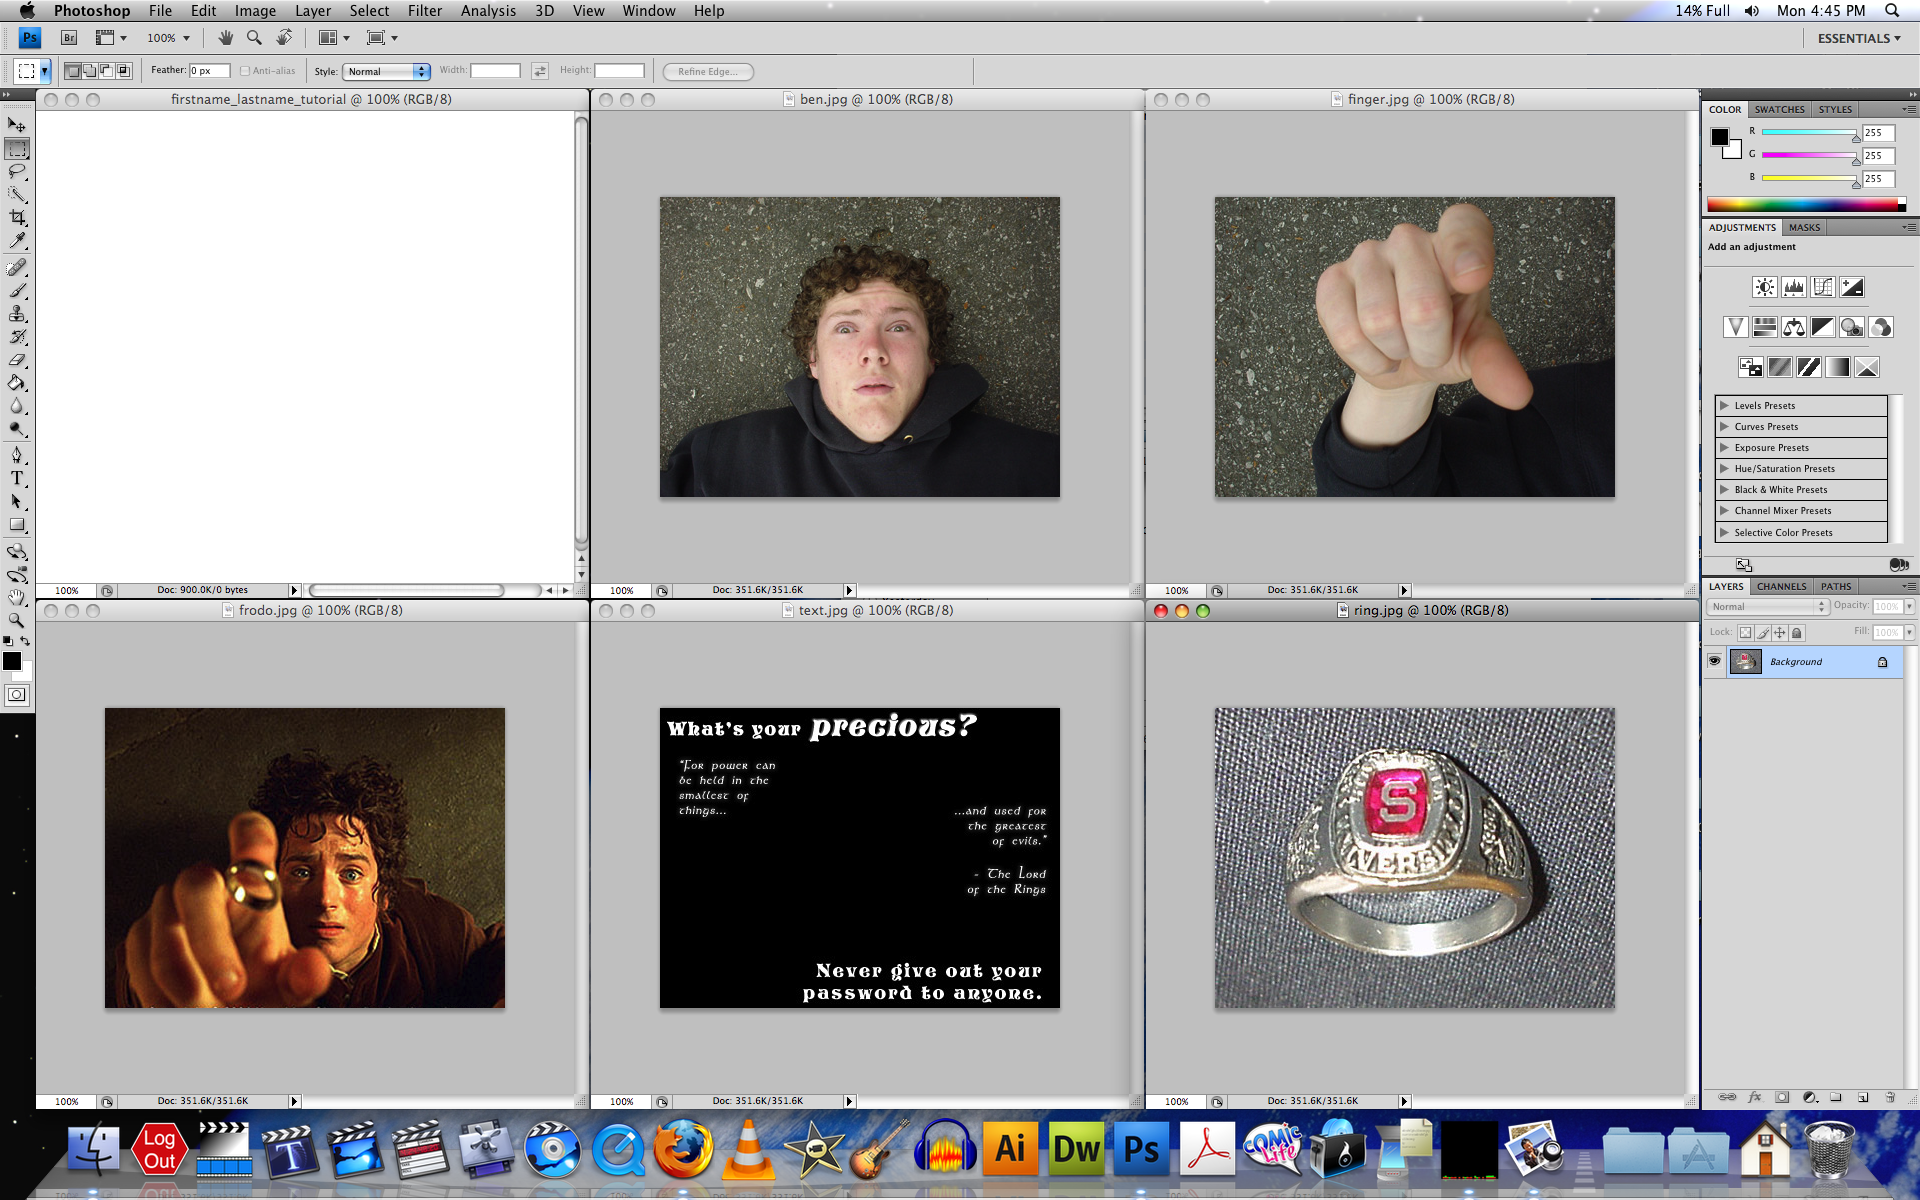
Launch Adobe Photoshop. When it opens, you should see a blank workspace, with a menu bar at the top, a toolbox on the left, and series of palettes on the right.
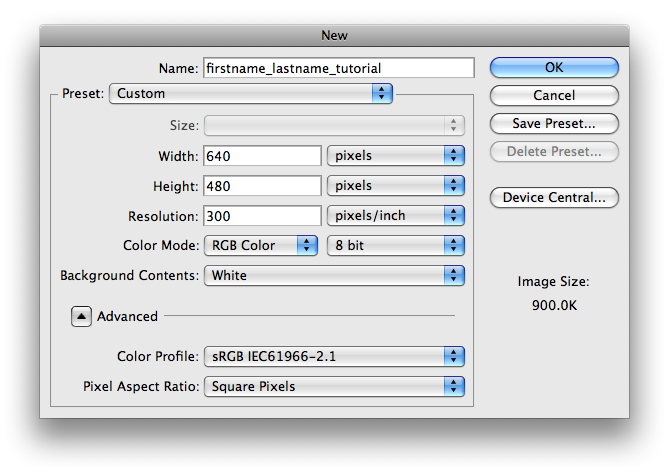
Select File > New. Name your project and define the dimensions for your project. It is usually advisable to make the canvas the same size as your largest source file.
Tutorial Tasks
- For this tutorial project, name your Photoshop document firstname_lastname_frodo, then under the Preset section select “Custom” preset in the dropdown menu for the working canvas size. Enter “640” and “pixels” for the width and “480 pixels” for the height and then click OK.
Acquire high-quality source files (digital photos, scanned images)
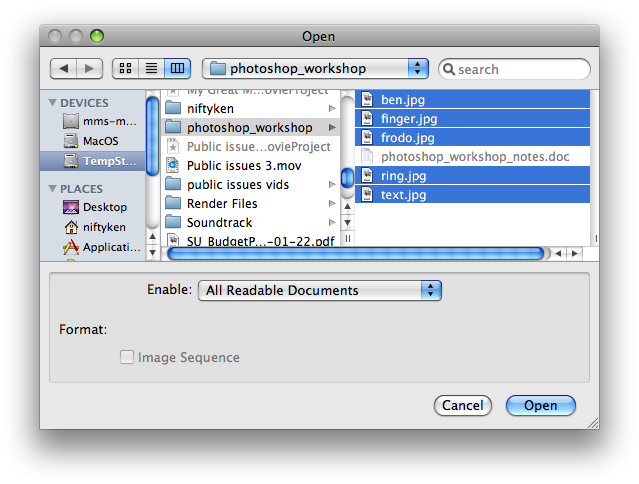
Select File > Open to open all of the files you need. For your own projects, you will want to get source files with the highest resolution possible, so that your final print elements will not appear blocky and pixelated.
Tutorial Tasks
- For this tutorial, we’ve already done the work of finding the inspiration (Frodo), taking the appropriate photos, and gathering the materials together! All of the necessary files are located in the photoshop_workshop folder. Open all of the JPG files in Photoshop. (There are 5 JPG files.)
- Some users may notice that all of the opened documents are confined to one window. If so, click Window Menu > Arrange > Float All in Windows to break them apart for easier viewing. After that, you can also try Window Menu > Arrange > Tile.
Manage layers: Create, rename, rearrange, hide, duplicate
Layers are an essential part of the Photoshop paradigm to understand. Like transparencies for an overhead projector, layers can be stacked, and the elements of a lower layer can be visible if elements on a upper layer are not obscuring it. Layers are a way to help you manage the compositing process. Most of the functions in Photoshop will only act on one layer at a time. This section will merely scratch the surface with regard to layers.
Make sure each source file is open as a new window within Photoshop. To start working with layers, click on the window of each source file, then use Select > All followed by Edit > Copy. Select the window of the working document and use Edit > Paste to insert the source file as a new layer in the working file. Each time you use the Paste function, a new layer is created directly above the layer you had selected.
You can rename layers as you please. You can do this by using Layer Menu > Layer Properties.
Reorder the layers as necessary in your working file. You can do this by clicking on a layer and using the Layer Menu > Arrange options to move the layer forward or back relative to its neighboring layers.
You may want to turn off the visibility of certain layers temporarily to be able to work more effectively. To do so, click on a layer in the Layers palette, and use Layer Menu > Hide Layers.
Before working on a layer, you may want to duplicate it to have a backup copy just in case your edit goes wrong. To do so, select the layer and use Layer Menu > Duplicate Layer and type in a name for your new copy.
Tutorial Tasks
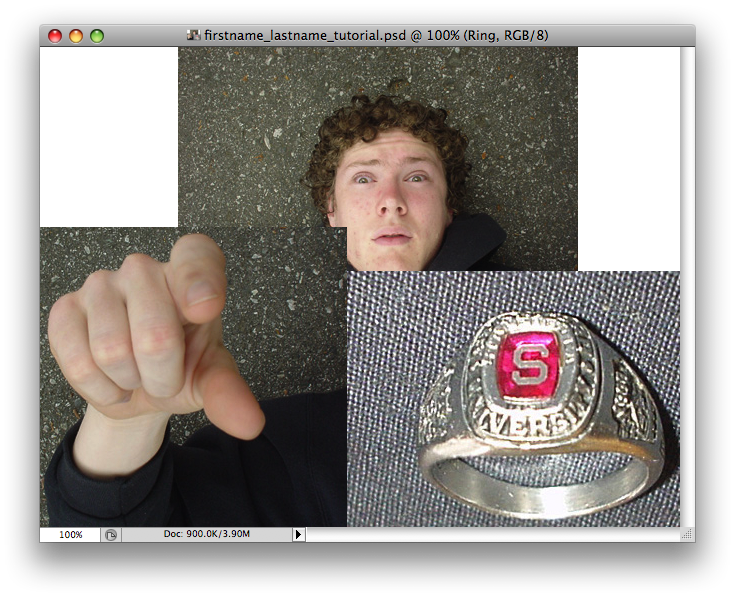
- Copy and paste the ben.jpg, finger.jpg, and ring.jpg images as new layers in your working “tutorial” project. Notice that with each paste function, the new layer completely obscures the bottom layers. This is normal, and we will remedy this in a little bit. For now, keep track of your layers in the Layers palette.
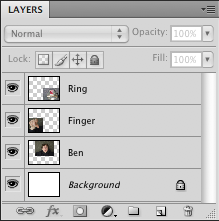
- Rename your layers “Ring”, “Finger”, and “Ben” as appropriate.
- Remember that the ring layer should be on top of the finger layer, which should in turn be on top of the ben layer to achieve the intended effect. Rearrange them if necessary.
- Hide the Ring layer so you can take a look at the Finger layer.
- Select the Finger layer and duplicate it for practice. Delete the duplicated layer before continuing.
Save early and often!
Save early and save often by going to File > Save! You may want to do this every time you make a satisfactory change to your project.
Use the Edit > Undo and Edit > Step Backward functions liberally. Edit > Undo will keep alternating between the most recent function and the function before it. Edit > Step Backward allows you to go multiple steps back.
Take a look at the History palette to see the list of most recent functions you have performed on the document.
Tutorial Tasks
- How about saving your project right now?
Select areas to edit
Photoshop has selection tools tailored for different selection tasks:
 |
Use the Marquee tool to create a rectangular or circular selection. With a marquee tool, drag to draw a selection border around an object. |
 |
Use the Lasso tool for freehand selections and other geometric shapes. |
 |
You can select areas of similar color using the Magic Wand tool. (The Magic Wand tool may be hidden under the Quick Selection tool. If so, click and hold the Quick Selection tool until the Magic Wand tool is revealed.) The marquee around the area you click with the Magic Wand indicates that the area is now editable. |
Use Select Menu > Deselect when you don’t need a selection anymore.
Use the Shift key to add to an existing selection, or the Alt key to subtract from an existing selection.
For selecting complex objects that are sharply delineated against a plain background, you can select the background with the Magic Wand and invert the selection to select the object by using Select Menu > Inverse. Notice that the selection border changes to outline the object.
To soften the edges of a selection, use Select Menu > Modify > Feather and enter the number of pixels along the perimeter of the selection that you want to blur. (Older versions of Photoshop just click Select Menu > Feather.) Blurring the edges is useful when you are trying to combine various elements into a composite image realistically.
Tutorial Tasks
- Select the Magic Wand tool. Make sure you have the Magic Wand selected, and not the Quick Selection Tool for this exercise. Set the Options bar to 60 for Tolerance and check the Anti-alias and Contiguous boxes.
- With the Magic Wand still active, select the Ring Layer, and then click on some part of the red stone on the ring. It should select nearly all of the stone. If you missed, try again. Try switching to the Eraser tool and dragging an eraser over the whole image to verify that only the part selected by the Magic Wand is affected.
- If you are using the Selection tools to select image elements to edit, try using the Select Menu > Modify > Feather setting to give the selection a slight blur. This will make it easier to realistically blend this layer in with other layers after your edits.

Delete unnecessary content
Once you have a selection created, you are free to edit the contents within the selection. (Or, if nothing is selected, the entire canvas is available for editing.) For example, you may want to erase unnecessary content. Erasing elements from a layer allows the content of layers below it to show through.
 |
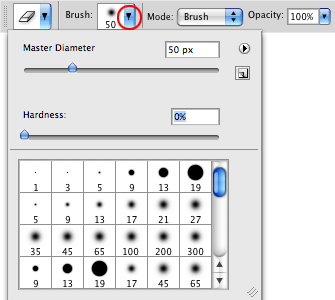
To erase elements, use the Eraser tool. To change the size and the edge hardness of the Eraser brush, click open the “Brush” popup menu in the Options bar and adjust the Master Diameter and Hardness values. |
Remember you can temporarily use Layer Menu > Hide Layers on the layers you are not working on if they are in the way.
Tutorial Tasks
- Try erasing the checkered fabric out of the ring layer with the Eraser Tool. Start with a larger brush to take away big chunks of the image, and use smaller brushes with a lower hardness value as you get closer to the ring itself. You can use the left and right bracket keys on the keyboard, [ and ], to quickly decrease or increase the size of the brush.
- Also, try using a softer brush by clicking open the Brush settings in the Options bar and setting the Hardness level to 0. It will enable you to blend objects more naturally together as you extract them from their original backgrounds.
Advanced Techniques
- Erasing is what is considered a “destructive” technique because you are throwing away / deleting pixel data. Once you save your project after erasing, the erased content is gone. A “non-destructive” method to perform the task of removing content from a layer in order to show the content of lower layers is to employ the use of Layer Masks instead. For help with Layer Masks, please see the Photo Editing tutorial.
Perform transformations and adjustments
By now, you should have erased or masked out most of the irrelevant content, and are ready to arrange your composition.
You can perform transformations and image adjustments on each layer individually. Always remember to select the desired layer in the Layers palette before attempting to adjust it.
 |
To move a layer around on the canvas, select the Move tool, then click and drag the layer on the canvas. |
To scale, rotate, or warp a layer, use the functions in Edit Menu > Transform. Choosing these functions will result in a bounding box placed around the layer elements, with handles to control the transformation. Hold down the Shift key while clicking and dragging to maintain the original proportions. You can also move the layer around by dragging while in the transform mode. When you have adjusted the layer to your satisfaction, hit the Enter key to commit the change.
![]()
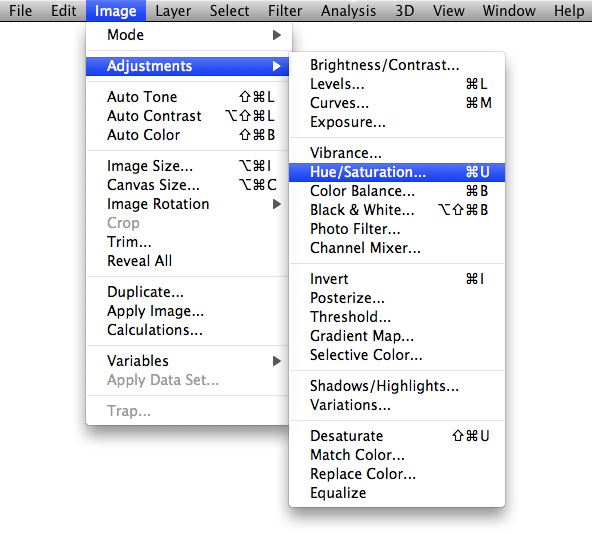
To adjust the brightness, contrast, or color quality of a layer, use the function in Image Menu > Adjustments. You can preview the changes before you commit them.
Tutorial Tasks
- Use the Frodo image to get an idea of your goals.
- Try resizing the Finger layer in relation to the Ben layer to match the Frodo composition.
- Try resizing and rotating the Ring layer in relation to the Finger layer to match the Frodo composition.
Advanced Techniques
- Another way to apply Adjustments is to use Adjustment Layers, which is another non-destructive technique. See below for details.
Retouch using the Healing Brush and Clone Stamp
 |
 |
The Healing Brush Tool and Clone Stamp Tool operate on a similar principle: Define a source, then click and drag to “paint” the source characteristics to the destination point. |
Tutorial Tasks
- Try removing blemishes on Ben’s face using the Healing Brush tool. After selecting the tool, hold down the Alt key and notice that the cursor changes to a crosshair. Click on a smooth part of his face, then release the Alt key. You have now defined the source. Set the brush size to 5 in the Options bar. Now go to a blemish on his face and click on it. The blemish should be replaced with a patch of smooth skin.
- Try giving Ben more hair to match Frodo’s using the Clone Stamp tool. After selecting the tool, hold down the Alt key and notice that the cursor changes to a crosshair. Click somewhere in his hair, then release the Alt key. You have now defined the source. Set the brush size to 30. Now move your cursor to a location slightly above his hair, and click and “paint” new hair, which should blend in with his original hair.
Add text layers
 |
Adding text is easy. Click the Text tool and click and drag a bounding box for your text. A new text layer will be created. You can adjust the font settings in the Options bar. Every time you use another tool before using the Text tool again, it will create a new text layer. If you wish to modify preexisting text layers, be sure to have the layer selected, and click on the text while the Text tool is selected. |
Tutorial Tasks
- Try to match the text in the text.jpg reference file. Create a new text layer for each block of text for the greatest amount of editing control.
Apply filters and special effects to layers and selections
You’re on your own with these ones. Photoshop has hundreds of choices in the Filters menu for you to try out. Remember to select the layer you wish to affect before applying a filter. You may want to make a duplicate copy of a layer before applying a filter, just in case you change your mind later, or if you want to compare effects.
Image adjustments can be done in the same way by selecting the desired layer, then using the functions in Image Menu > Adjustments. Alternatively, you can create an adjustment layer by using Layer Menu > New Adjustment Layer. The power of this function is that the adjustment layer will affect every layer below it, and you can also tweak an adjustment layer whenever you please by double-clicking on it in the Layers palette.
For additional information about Filters and Adjustment Layers, please see the Photo Editing tutorial.
Tutorial Tasks
- Try placing an adjustment layer on top of the ring layer. Select the Hue/Saturation function. In the dialog box, set the Saturation level all the way to the left and click OK. The project should now be in grayscale. What happens if you move the adjustment layer behind the ring layer?
Apply other layer functions as necessary: Opacity, merging
To adjust the layer opacity if you want to make the layer appear semi-transparent so that lower layers can be made visible, use the Layer Menu > Layer Style > Blending Options dialog box. You can see the effect of your opacity settings before committing the change.
To combine layers so that they will operate as a single unit, select the topmost layer you want to merge, and use Layer Menu > Merge Down.
For the most part, it is a good idea to keep layers separate so you can work on them individually. If you want to treat them as a single unit without merging them, select multiple layers in the Layers palette by holding down the Shift key while clicking, and then going to Layer Menu > Link Layers. Now you can move and apply transformations to both layers at the same time.
Tutorial Tasks
- Just for fun, adjust the opacity of the ring layer to give the ring a transparent look. Then link the Finger and Ring layer together and move them around together. You may want to use Edit Menu > Step Backward to undo your changes afterward!
Save completed project in an appropriate file format
It is recommended that you keep your document saved as a Photoshop Document (PSD) until you are completely done with the project. And even then, it is advantageous to keep it in the PSD format in case you ever need to edit it again.
However, Photoshop files can be very large, so when preparing the image to give to someone else as a finished product, you may want to use the following guide to determine what file format to export your image as:
- JPG is an accepted standard for photographic images. JPGs tend to be very small in file size. Because JPG is a “lossy” format, your images will lose a bit of quality each time you save it as a JPG.
- GIF is an accepted standard for images with only solid colors and no gradients or shades (i.e. some simple posters and flyers and logos). GIFs tend to be quite small in file size, but are not suited for photographic images.
- PNG is a newer standard for all types of images. They retain better quality than JPGs. However, older computers and programs do not always recognize PNG files.
Tutorial Tasks
- For this tutorial, let’s assume that you will need to submit this project to an instructor. If they can accept a layered Photoshop document (PSD), that would be ideal as it will retain as much quality and editability as possible.
- If you need to export a “finished” product, you will most likely use File Menu > Save As… and change the format to JPEG (or JPG). Name the file firstname_lastname_tutorial, then click OK. Under the Quality setting, type in 10, and click OK.
Prepare document for print
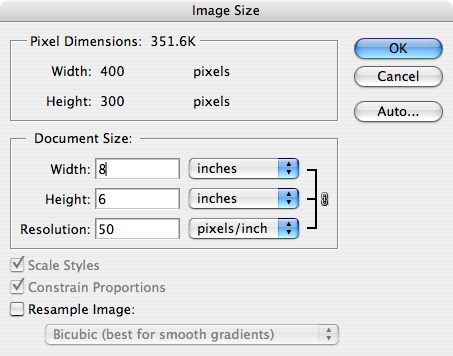
When you are ready to print your image, you must first ensure that the document is set to print the way you want. Go to Image Menu > Image Size dialog box.
In general, to retain the best image quality, be sure to uncheck the “Resample Image” checkbox. Notice how this makes the Pixel Dimensions section unavailable for editing.
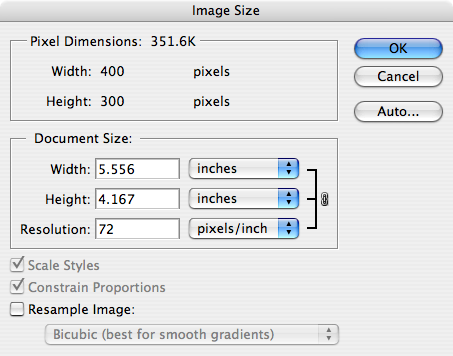
Under the Document Size section, set the document width and height. Notice how these values are linked, so that your image dimensions will remain proportional when printing. Notice how the Resolution is linked to the Document dimensions. You will probably want to retain a high enough resolution to ensure that the image will look acceptable when printed.
If you want to print an image “as big as possible” while retaining image quality, you may consider setting the resolution first, and having Photoshop calculate the resulting document print size.
As a loose guideline, here are some suggested resolutions for particular types of print jobs:
- 72 pixels/inch: For most people, this print resolution is too low and will not be adequate to reproduce quality results.
- 180 pixels/inch: For most people, this is an acceptable print resolution for presentations and flyers that are not entirely photographs.
- 300 pixels/inch: Most people do not need this high of a resolution unless they are printing high-quality photos.

Tutorial Tasks
- You will notice that if you walked through these guidelines with the tutorial files, the image is will only be 2.2 x 1.7 inches when printed at 180 pixels/inch! This is just a case in point that objects on the screen tend to look bigger and sharper than their printed counterparts. Please be sure to use high-quality, high-resolution source images when starting a project or else you may be stuck with a low-quality print to show for all your hard work!
Next Steps
If you enjoyed this tutorial and don’t already have Adobe Photoshop CS4, support my site by getting it and the accompanying Classroom in a Book
through here!