Want to spice up your photos? This tutorial will walk you through some of the main photo editing features of Photoshop by selectively applying adjustments and filters to an existing photo. There’s no way I could adequately cover what all of the Adjustments and Filters do in just one tutorial, so I will show you a few techniques with our favorite effects and let you explore the rest on your own. All materials have been prepared using Adobe Photoshop CS4.
Some super-quick video tutorials from Adobe exist for the following topics:
- Brightness and Contrast Correction
- Photo Restoration and Retouching
- Color Enhancement and Adjustment Layers
- Sharpening Images
- Cropping an Image
Getting Started
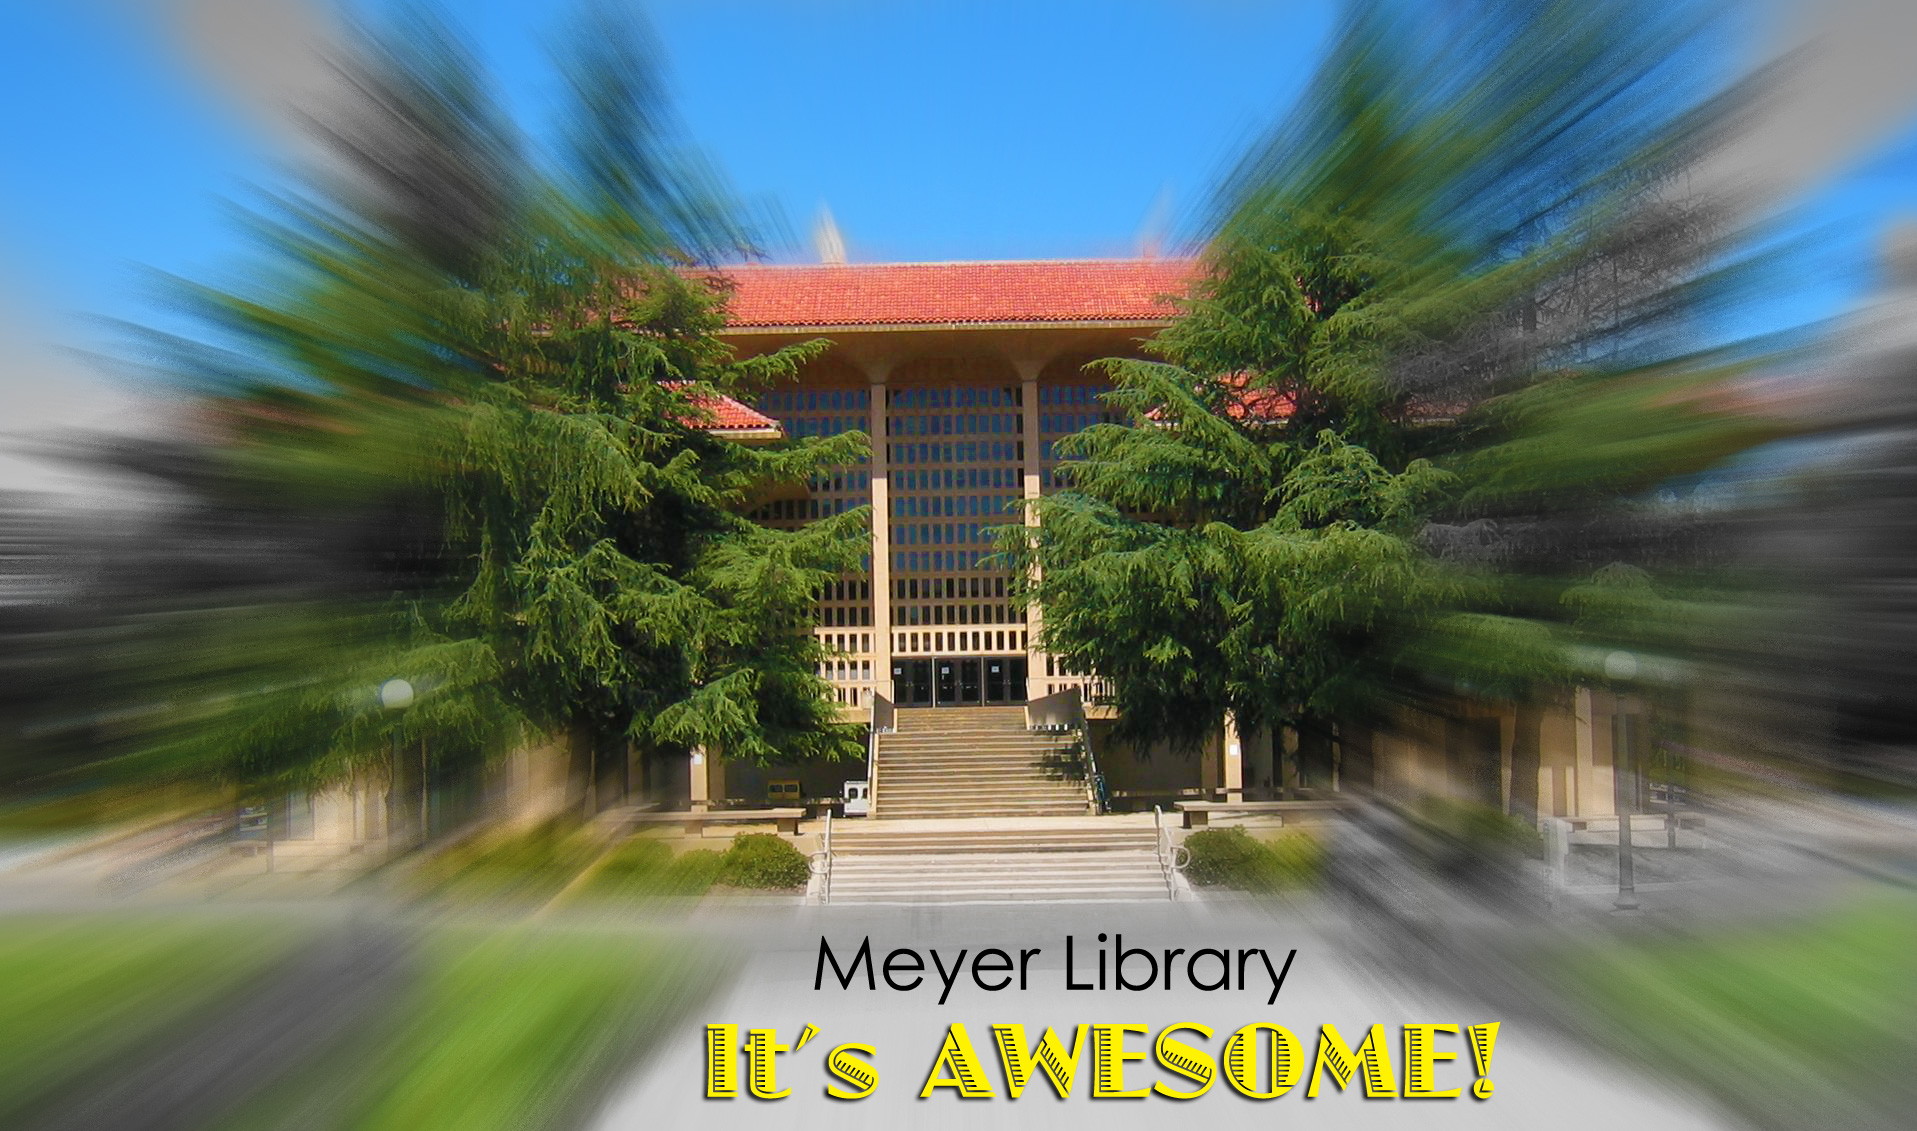
For this tutorial, we will be editing a photo of Meyer Library at Stanford University taken by Ellis Lau. We chose this photo for this tutorial because it has been released into the public domain, meaning it is available for our use for any purpose without any conditions by a copyright holder. In order to acquire this image, we went to http://search.creativecommons.org, which is our recommended site for finding quality images, sound, and video that is licensed for legal sharing and remixing. (Be sure to check the specifics of each file you use for any conditions set by the copyright owner.) 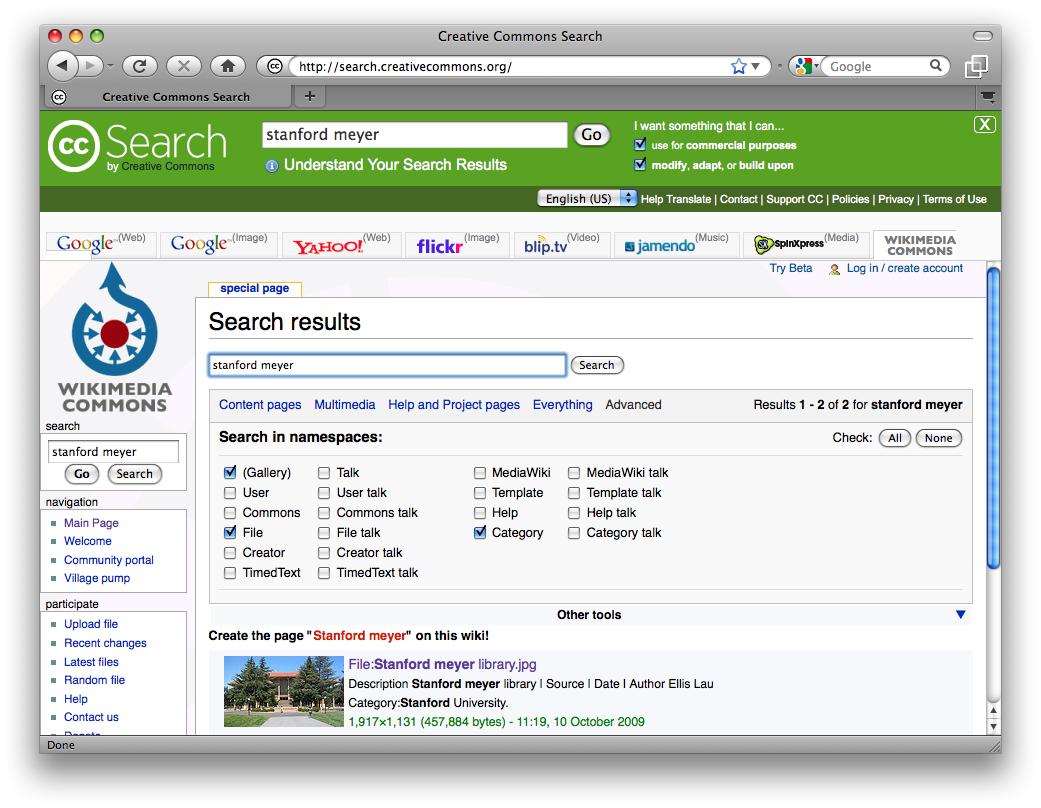
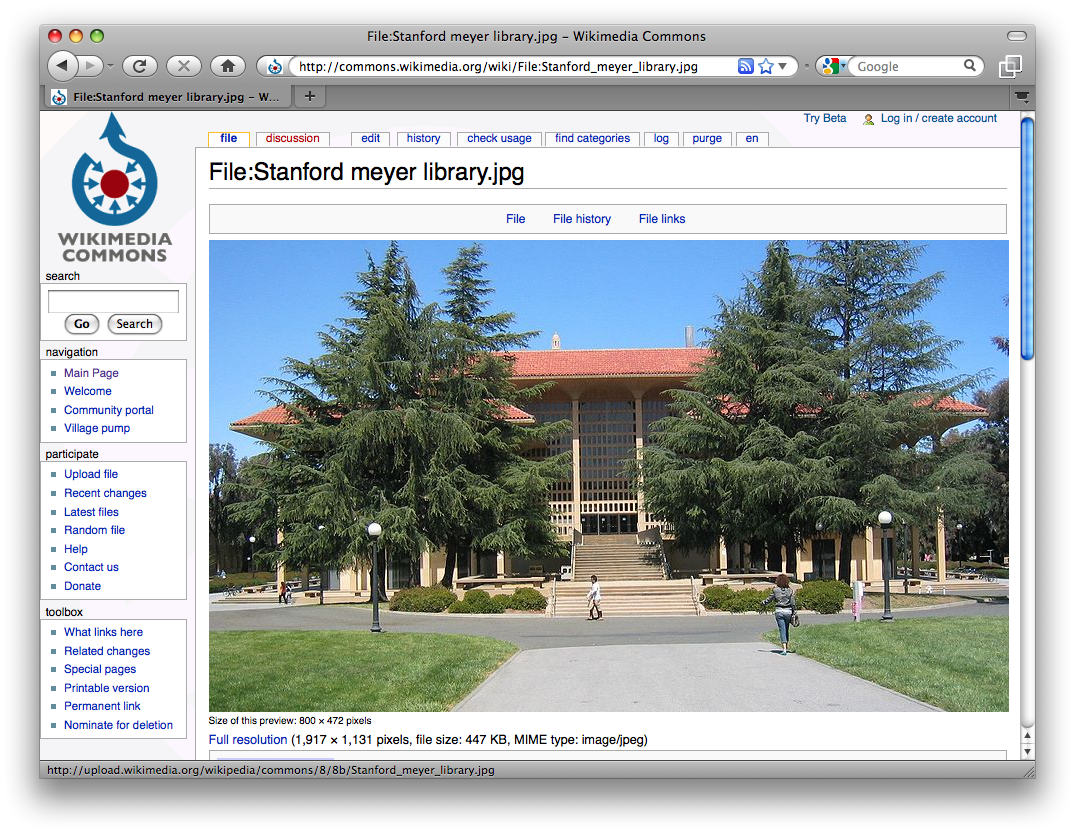
From there, we searched for “stanford meyer” and ultimately was directed to this Wikimedia Commons page. We can see from the copyright notice that this photo is in the Public Domain and is completely free for download and for our use. Thanks, Ellis! We then click on the “Full Resolution” link to download the original photo.
Tutorial Tasks:
- Visit http://search.creativecommons.org and try a few random searches of your favorite topics and see what photos may be available for your legal use.
- Locate the photo of Meyer Library or another interesting and appropriately-licensed photo and download it to your computer. If you’re following along, it’s probably easier to start with the same photo. If the photo is no longer accessible from the original site, you may also download it here: stanford_meyer_library.jpg
Create a New Photoshop Project
Now that we have acquired a source photo, launch Photoshop. Once the application has launched, click File Menu > Open and locate the photo on your computer. Before you do anything else, click Image Menu > Duplicate to make a copy of the original. Add the word “edit” to the end of the document name so you will know later that this is not the original.

It is always a good idea to work off of a duplicate version of the file so you do not accidentally save over the original. So close the original document by selecting it and clicking File Menu > Close. (If you have trouble finding the original document, it is probably because Photoshop consolidated your documents as different tabs in the same window, like an Internet browser. Open the Window Menu to select Stanford_meyer_library.jpg and close that document.)
Tutorial Tasks:
- Create a duplicate of your original photo in Photoshop. We’re going to do a lot of experimentation, so keep your original safe and out of harm’s way!
Adjustment Layers
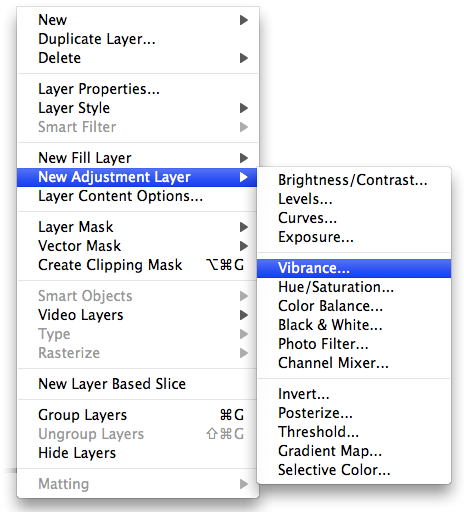
For most photos, the most popular kinds of edits are Image Adjustments. Often photos don’t quite have the desired combination of brightness, color balance, contrast, and other factors when they come straight off the digital camera. What the camera recorded and what you remember seeing perhaps don’t quite match, and that’s where Adjustments come into play. Sometimes we may also want to use Adjustments to alter a photo’s qualities for a special effect. If you have a photo that is too dark, or too bright and washed out, or the wrong color balance due to weird lighting, you’ll want to applying the corresponding Adjustment Layers to correct those situations. For our example, we’ve inspected the photo and decided that it’s already a good photo that doesn’t require those adjustments, so we’ll show you how to use one of the more new and fun Adjustment Layers: Vibrance. Click Layer Menu > New Adjustment Layer > Vibrance. Go ahead and keep the name “Vibrance” and click OK.
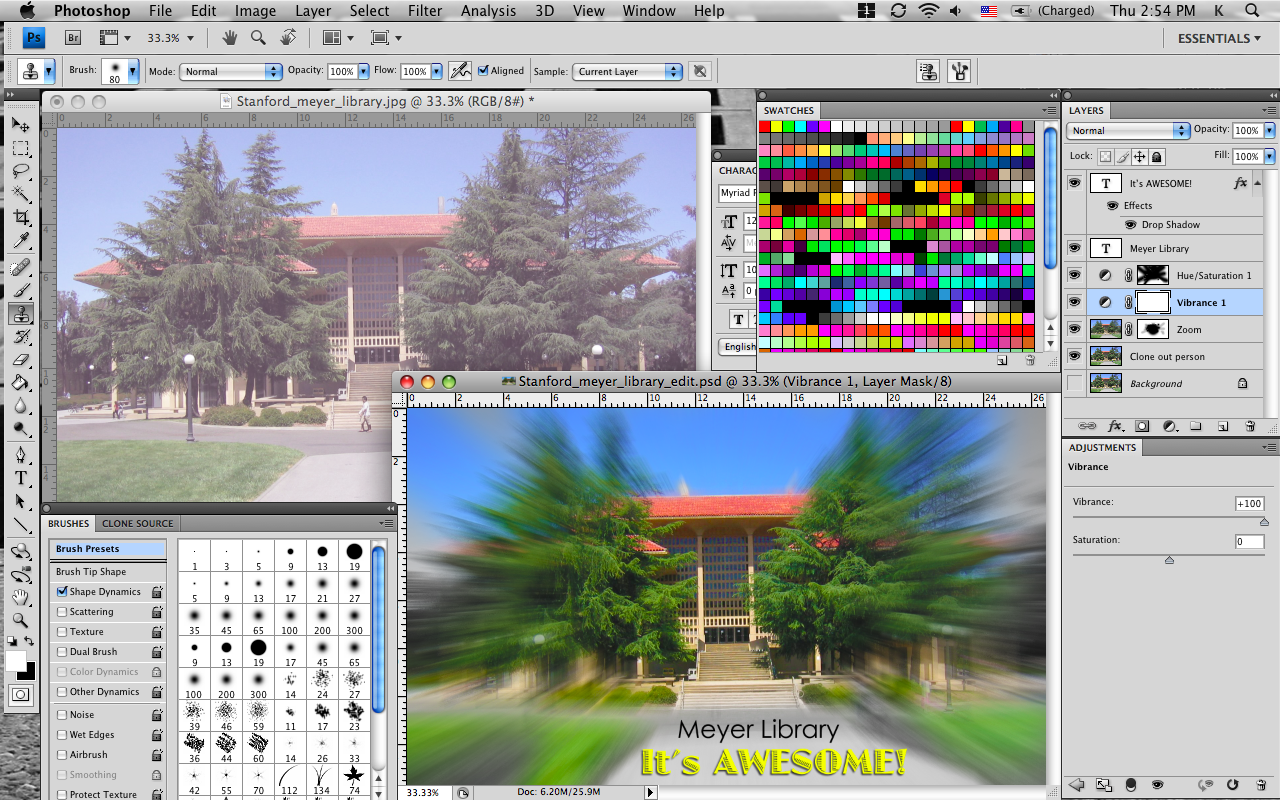
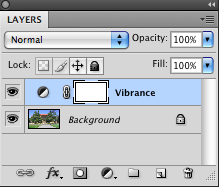
At first, it may seem like nothing happened. But if you check your Layers palette on the right of the screen (make sure it’s enabled under Window Menu > Layers), you’ll see that a new Adjustment Layer has been added. Now find the Adjustments palette (make sure it’s enabled under Window Menu > Adjustments) crank the Vibrance slider from 0 to +100 to make the change really obvious. (You probably won’t want to do this for all of your photos…)
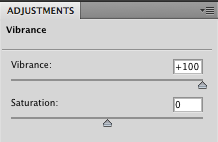
Ahh, a dose of technicolor radiation is just what the doctor ordered.
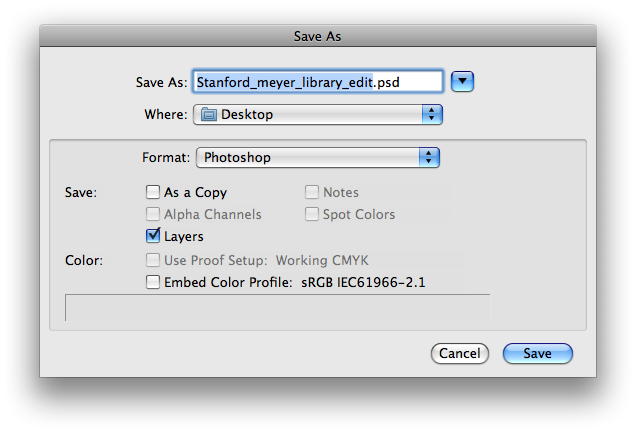
Now would be a good time to start saving your work on the duplicate file. Click File Menu > Save As. Make sure to select Photoshop from the Format dropdown menu if it isn’t already selected. It’s probably fine to keep the other default settings. Click Save.
Now we’re going to try something a little more complicated. In order to suggest that the splash of color is emanating from Meyer Library itself, we want to actually reduce the color of the outer edges of the photo to black and white (also called grayscale). To do this, we will again be using another Adjustment Layer, but we will be using it selectively so that it only affects part of the image. Click Layer Menu > New Adjustment Layer > Hue/Saturation. You can keep the default name or call the layer “Desat” as a reminder later of the desaturation that will be applied through this layer. Click OK. Now the Adjustments palette should show you some new controls that correspond to your new layer. Crank the Saturation slider from 0 to -100. Goodbye, color!

Didn’t that just override our previous work, since the Adjustment Layer seems to affect everything below it in the Layers stack? It appears so, but now we will punch a hole through the Hue/Saturation Adjustment Layer in order to let some of the contents below shine through. We will do this non-destructively by using the Layer Mask. Click on the Brush Tool from the Toolbox on the left of the screen. It looks like the one in the middle here and will say “Brush Tool” if you hover over it:

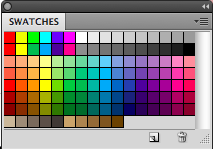
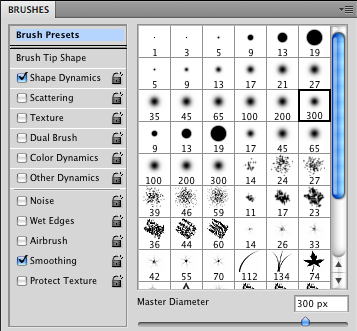
Select Black as your brush color. You can do this by ensuring the Window Menu > Swatches palette is open and then selecting the blackest black. (If you hover over the color, it should say “Black”.) Open the Brush palette and select the 300-pixel brush indicated below here:
Now make sure the Hue/Saturation Adjustment Layer is still selected and paint a SINGLE stroke across the middle of your document. If you did this correctly, you should experience the magic of seeing the color come back right in front of your eyes:
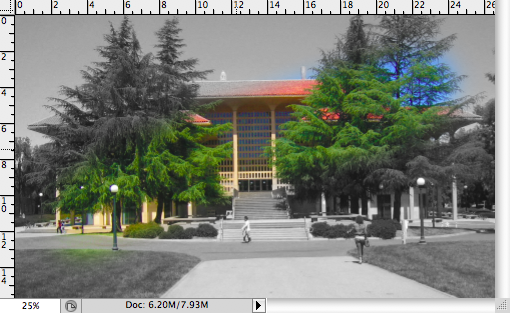
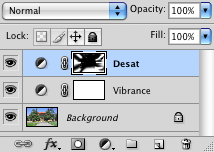
Now from the middle of the image, paint additional “black” strokes to reveal color bursting from Meyer. Change the diameter of the brush to make broader or narrower strokes. If you don’t like a particular part of your painting job, switch to White and paint the desaturation effect back in! That’s one of the benefits of this non-destructive technique — we can go back whenever we want and edit it some more without starting over from scratch. Why do you see color when you paint with black anyway? What is basically happening is that you are painting on a Layer Mask, which is automatically added for you when you created the Hue/Saturation Adjustment Layer. Now when you paint black on the Layer Mask, you are tell Photoshop to “make that part of the layer transparent.” It’s like you’re using a Hue/Saturation stencil — whatever is fully white on the Layer Mask will allow the Adjustment Layer to work 100%. Whatever is fully black on the Layer Mask will disable the adjustment. And if you paint with any grayscale values in between, it will adjust the transparency accordingly. That is why we suggested using a 300-pixel brush with a soft edge around it. That way the transition is smooth and more photorealistic. Okay, that was a hefty section! Once we’re happy with the state of the Layer Mask, we save our work. Here is our document and the corresponding Layers palette so far:

Filters
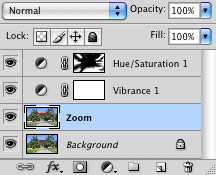
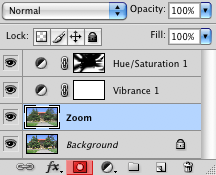
Filters can be used to create special effects, like creating fake motion blur, adding graininess to emulate the “film look”, or making your photo look like a pencil drawing. We’ll just show you how to apply one to get you started. Be careful now! Filters tend to only work on the selected layer (as opposed to all of the layers below it, like Adjustment Layers do). What we will do first is duplicate the Background layer by selecting it in the Layers palette (make sure the Background layer is now highlighted in light blue) and then clicking Layers Menu > Duplicate Layer. Name it “Zoom” and click OK. Notice that the duplicated layer is created directly above the layer you had previously highlighted. Your Layers palette should now look like this:
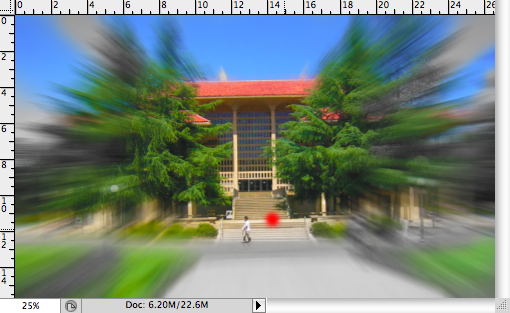
Now apply this fun filter to the Zoom layer: Filter Menu > Blur > Radial Blur. Select the following values for the dialog box that pops up:
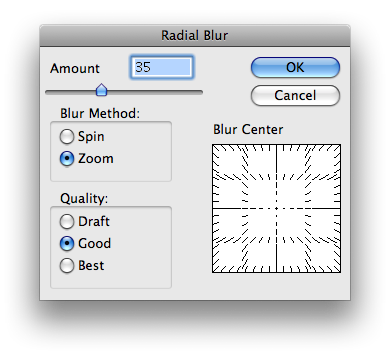
And this is what we got:
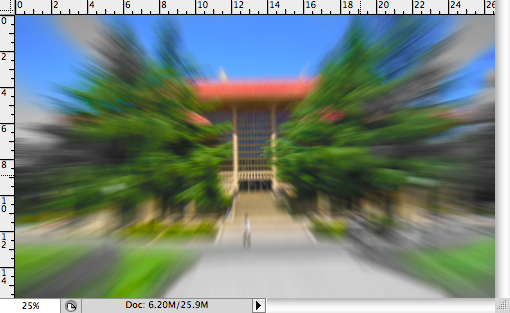
Whoa. The effect seems a bit much, like we’re about to get sucked into a vortex, and we can barely tell it’s even Meyer anymore. We’re going to tone this effect done a bit by applying a Layer Mask and selectively turning off the effect for the middle of our image. Unlike Adjustment Layers, Filters do not usually have a Layer Mask automatically generated for it. Instead, we have to click the button highlighted in red at the bottom of the Layers palette to add a Layer Mask for the selected layer:
Now that we have a Layer Mask, we can use the same black and white painting method from before to selectively eliminate parts of the Zoom effect. Wherever we paint black on the Layer Mask, we allow the “normal” Background layer to show through. Be careful though — unlike Adjustment Layers, regular layers have both layer content and a Layer Mask. Be sure to click on the Layer Mask icon for the layer first before painting, otherwise you really will paint black and white on your layer content! When a Layer Mask is selected, it has tiny black brackets around it. Otherwise, the Layer thumbnail will have the brackets. Make sure you know which element you are modifying! And don’t forget to save your work. Here’s what we came up with in terms of a selective filter, and the painted Layer Mask is still selected, as indicated in red.

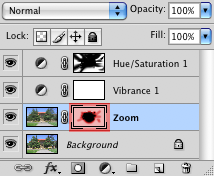
Photo Repair
Sometimes there are distracting elements in your photo that you want to get rid of, such as a lamp post, or dust spots, etc. Sometimes you want to add copies of elements that exist in your photos. For both intents, you can try the Clone Stamp Tool. In our example, the person walking in front of the stairs is distracting, so we’re going to “clone” that person out. First, select the Background layer and click Layer Menu > Duplicate Layer to create a new working layer. Name it “Clone out person”. The new layer is automatically selected. Now select the Clone Stamp Tool, which look like this on the left hand side of the screen:

To use the Clone Stamp Tool, we first select the 15-pixel soft brush from the Brushes palette, which is just about the width of the person we want to clone out. Then we held down the Alt/Option key to get the crosshairs cursor to set our “source”. A source is the place you are going to start cloning from. For this example, we held down the Option key and clicked on the stairs to the right of the person’s head. We tried to get a piece of the stairs that was free of other stray marks, etc. The red dot shows where we Alt/Option-clicked:
Now let go of the Alt/Option key and click and drag at your destination (the person’s head) to start cloning from the source. We clicked from the person’s head to his feet. If it doesn’t look good, you can click Edit Menu > Undo to try again. You may have to try this a few times or even define a new source to get this just right. If you’re getting frustrated with this part, you can try to clone some other stuff. For example, define the man has the source, and then paint copies of him beside himself! Note: If you start experimenting with the Clone Stamp Tool in other parts of the image and are wondering why it doesn’t seem to be working, remember that the Zoom layer has content that is probably covering up most of what is in the “Clone out person” layer. Save your work. Here’s what we came up with at the end of this segment:

Text Layers
To add text to our document, click the Text Tool on the left hand side.

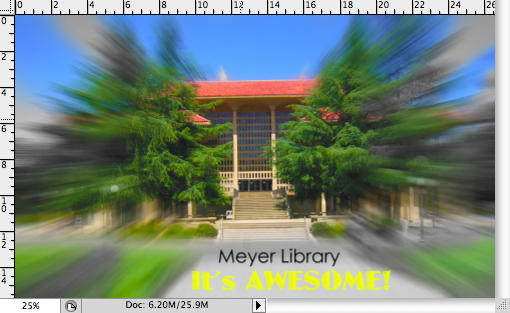
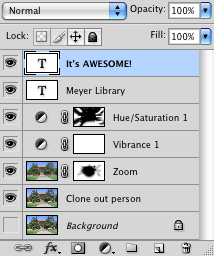
If you click on an area of the document that doesn’t already have text in it, a new layer is automatically created for you and you can start typing. You can of course change the font, font size, color, etc. When you want to stop editing your text, select any other tool on the left side of the screen to exit Text editing mode. Notice that the name of the Text layer automatically reflects the first few words of what you typed. To reenter Text editing mode, select the Text Tool, select the text layer, and then hover over the text with your mouse cursor. Click when the cursor changes to the typing icon. If you notice that some of your text is getting obscured by image elements, such as the “Clone out person” or “Zoom” layer, you can drag the text layer up to the top of the stack in the Layers Palette. You can reorder your layers any time to better organize your project. Just be careful of the effect of these moves. Remember, for example, that Adjustment Layers are designed to affect only the layers below them. In our example, we have created two separate text layers for easier management:
Layer Styles
Layer Styles (also known as Layer Effects) can be applied to any layer, but work particularly well on text layers. They allow you to quickly added drop shadows, embossing effects, and glows to a layer’s content. In our example, the “It’s AWESOME!” layer isn’t super-legible and doesn’t quite “pop” enough. We can add a Drop Shadow to it by selecting the text layer and clicking Layer Menu > Layer Style > Drop Shadow. A dialog box pops up and most of the default settings are fine for now, so the only thing we decide to modify is the Opacity to be 90% before clicking OK. 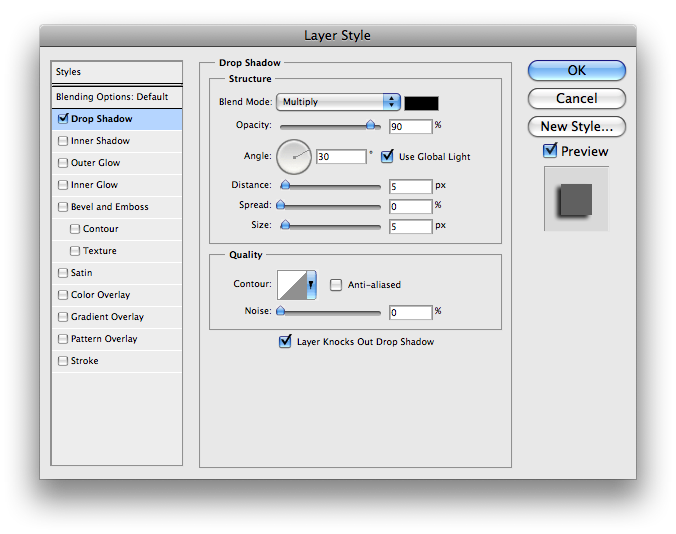
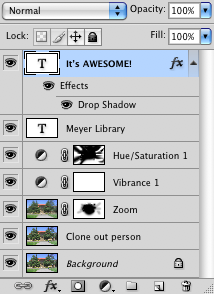
You can see that some new sub-layers have been added to the Layers palette to denote the Layer Styles. If you want to modify the Style, just double-click on the Style name to get the dialog box again.

Exporting Your Images
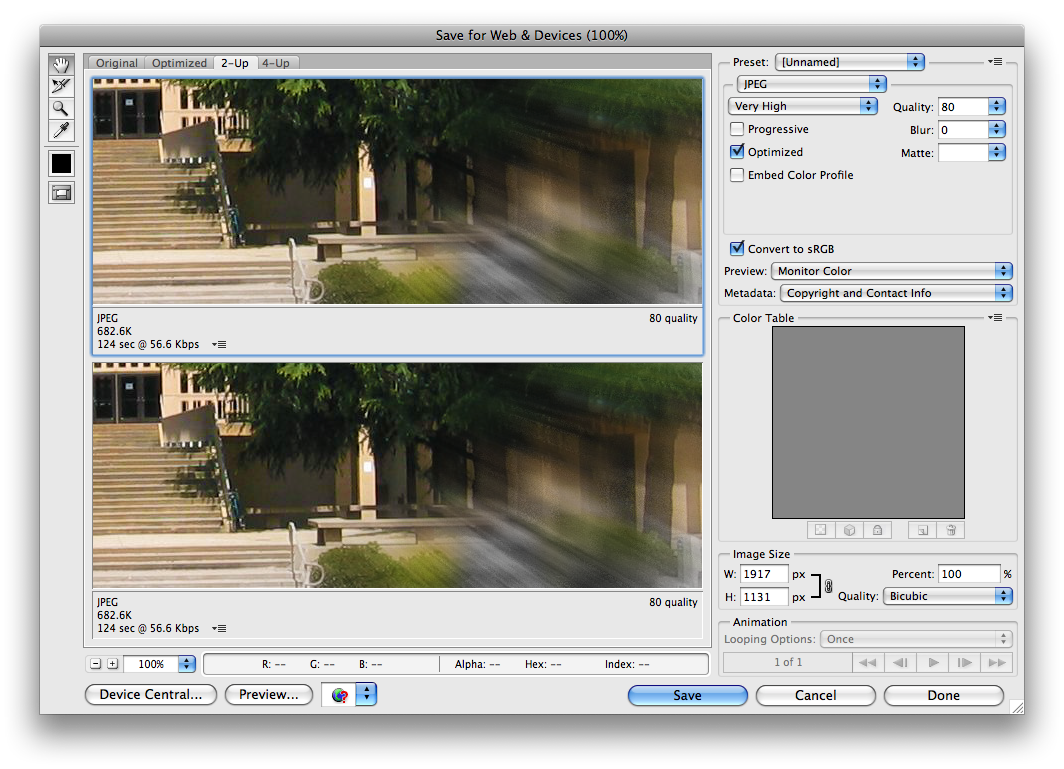
Okay, we’re done editing! Now we want to export it so our friends can enjoy it. Right now, the document is stored in the Photoshop Document (PSD) format. This is great for a working project, because it contains all of the layer and mask and adjustment data. However, this format is not compatible with the Web, and it requires Photoshop to open it. Plus, it’s over 26MB large, so it’s not very email-friendly either. So we need to export another version that’s appropriate for the purpose. (Keep your Photoshop Documents with all the layer data intact in case you want to edit them later!) For photos, the most popular format is JPG, so that’s what we will use. Click File Menu > Save for Web and Devices. In the dialog box that opens up, open the Preset dropdown menu and select “JPEG High”. You can then click and drag in the large image preview window to see different parts of your image and whether there is any image degradation between the original and the exported version. Just to be sure, we used a Quality setting of 80 before clicking Save. Confirm the new file’s name, click OK, and then remember to save your Photoshop document as well.
Congratulations, you’re done!
Next Steps
If you enjoyed this tutorial and don’t already have Adobe Photoshop CS4, support my site by getting it and the accompanying Classroom in a Book
through here!
Leave a comment